Wi-Fi has become an integral part of our daily lives, enabling us to stay connected, work remotely, and enjoy seamless online experiences. However, not all Wi-Fi networks are created equal. Personalizing your Wi-Fi setup can make a significant difference in performance, security, and overall user experience. In this article, we’ll delve into aspects of Wi-Fi personalization, we’ve got you covered.
To configure your Wi-Fi(Wireless) network, you’ll have to log into your router’s interface.
Here’s how we do that on one of our Zyxel routers…
To start the process, you’ll need a device(laptop/desktop PC, smartphone or tablet) connected to your router either via the default wireless details found on your router or via an ethernet cable between the router and your device.
Once your device is connected, you’ll have to log into the router.
Logging into the router interface:
- Once you are connected to the router (via WiFi or Ethernet cable), you will need to access the router’s interface using your web browser (Edge, Firefox, or Chrome)
- Click on your browser’s search/URL bar and type in the Default IP Address of your router. For Zyxel routers, this is 192.168.1.1 by default. Check the sticker on the back of the router for “Default IP address” if you are using a router other than Zyxel
- You’ll then be required to provide a username and password. For Zyxel, the default username is “admin” and the password will be found on the sticker on the back of the router
- If you cannot locate the login details or default IP address for your router (by checking the back of the device), please check the manual that came with it
Changing the wireless Name and Password:
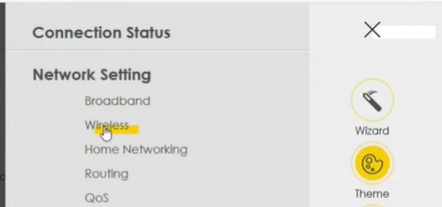
- On the top right corner of your Zyxel router’s interface, find and click the MENU button
- Then click the “Network Settings” option, followed by clicking the “Wireless” option. Below is an example of what this looks like
- Check beneath the heading labeled Wireless Network Settings for your Wireless Network Name
- You will then be shown the Wi-Fi name in the text box next to it which you can edit as you like

- Once your Network name has been edited, scroll down to the section labeled Security Level.
To change your password you’ll have to untick the “Generate Password Automatically” option. You will then be able to change password by clicking the text box next to the word Password.
Here’s what this looks like…
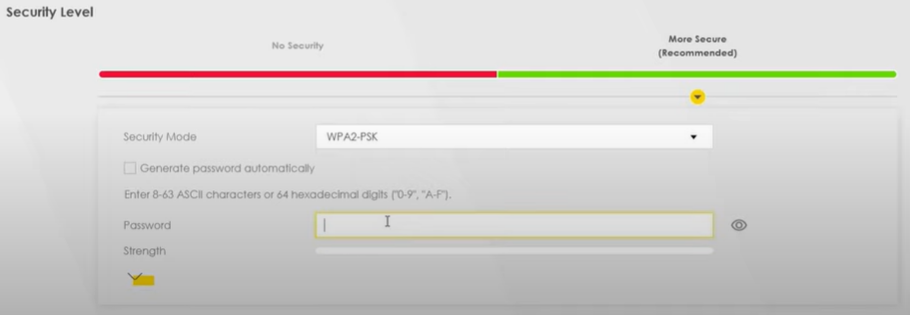
There’s only one requirement for this password and that is that the password should at least be 8 characters long.
It can contain either letters, numbers or a mix of both. We recommend that you use both letters and numbers. This way it won’t be easy for your neighbour to guess your password.
Once you’ve typed in your password, you can hit the APPLY button on the bottom of this page to save your brand new wireless name and password.
At this point, any devices that were previously connected to your wireless network, will disconnect. Don’t fear, all you’ll need to do is find your new wireless network name on your Wi-Fi networks list and connect to it with the new password.
If you have any issues connecting your devices to your wireless network, try this process again and if still nothing, contact one of our helpful support agents via Live Chat.
Contacting Live Chat Support:
- Visit our website and hover to the bottom right of your browser/screen where you’ll see a pink “Live Chat” button.
- Click on the pink button and once it has opened, pop us a message.
- Alternatively, you can add us on WhatsApp by saving the number 021 464 9500 and typing “Hi” to start the chat.
- The bot who runs our WhatsApp is called “Willie” and he’s available 24/7. Not only can Willie direct you to useful troubleshooting articles, but he can also tell you if there are any outages.
- If you contact “Willie” during our usual support hours, you can also opt to speak with one of our friendly support agents. Support hours can be found by clicking here.