
The ZTE MC801A 5G router gives you a fast wireless internet connection and WiFi coverage for your home.
This guide will help you unbox the router, insert the SIM card, connect your devices, and update the router settings.
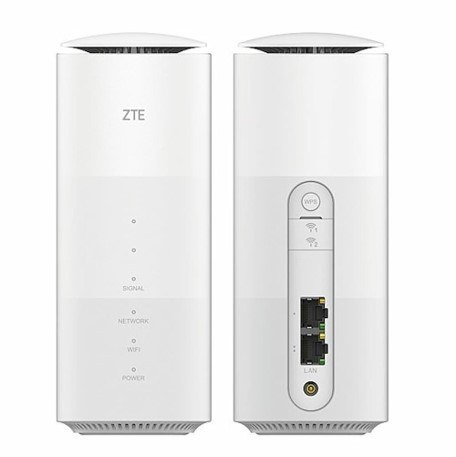
What This Guide Covers
You can follow the full guide from start to finish, or jump to the section you need:
- Unboxing and router information
- Inserting the SIM card and powering on the router
- Connecting to WiFi
- Logging into the router
- Updating WiFi and network settings
Unboxing Your Router
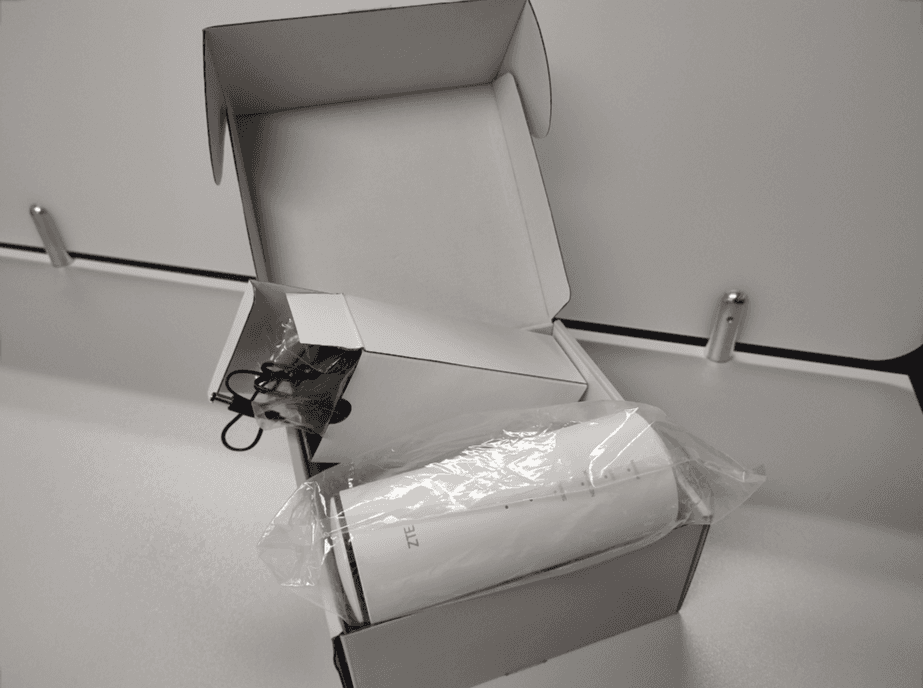
Inside the box, you should find:
- ZTE MC801A 5G router
- Power adapter
- Ethernet cable
- Quick start guide
- Safety information
Check the Router Sticker
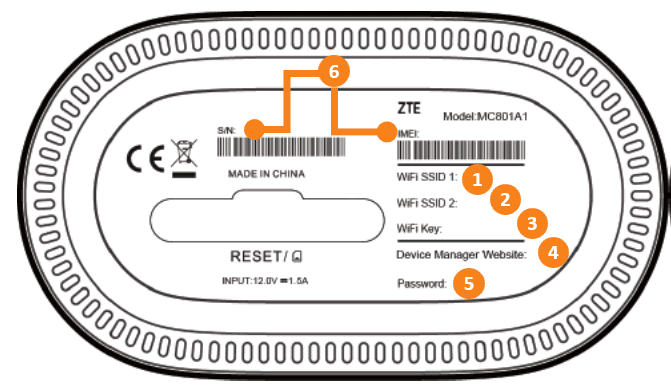
The sticker on the underside of the router contains important setup information.
This may include:
- 2.4GHz WiFi network name
- 5GHz WiFi network name
- Default WiFi password
- Router admin URL or IP address
- Router admin password
- IMEI number
- Serial number
Take a photo of the sticker before plugging in the router. It is much easier than flipping the router around later like you are trying to read ancient tablets.
Router Indicator Lights and Ports
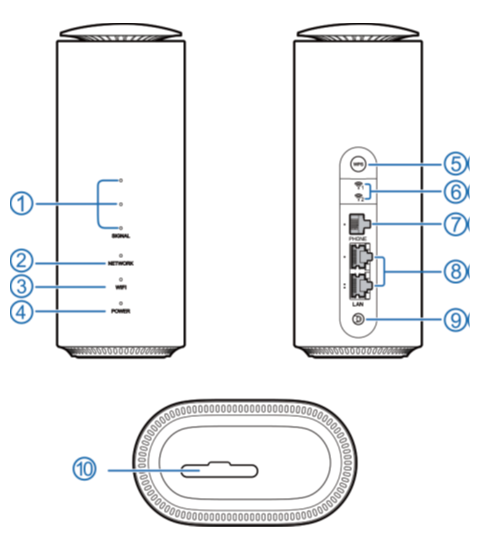
1. Signal Light
The signal lights show mobile signal strength.
More lights mean a stronger signal.
If the signal lights are off, there may be no signal or the SIM card may not be inserted correctly.
2. Network Light
The network light shows the mobile network status.
- Red: The router is powered on but not connected to the mobile network.
- Blue: The router is connected to a 3G or 4G network.
- White: The router is connected to a 5G network.
3. WiFi Light
The WiFi light shows the WiFi status.
- On: WiFi is working.
- Flashing: WPS is active.
- Off: WiFi is switched off.
4. Power Light
The power light shows whether the router is on.
- On: The router is powered on.
- Off: The router is powered off.
5. WPS Button
Press the WPS button to connect compatible devices without entering the WiFi password.
6. External Antenna Ports
These ports can be used for compatible external antennas.
7. Phone Port
The phone port may be available on the device, but it is only used if supported by the service.
8. LAN Ports
Use the LAN ports to connect a computer or other device with an Ethernet cable.
9. Power Port
Connect the power adapter here.
10. Nano-SIM Slot and Reset Hole
The nano-SIM slot is used for your SIM card.
The reset hole can be used to restore the router to factory settings. Press and hold the reset button for about 3 seconds to reset the router.
Only reset the router if you are comfortable setting it up again afterwards.
Insert the SIM Card
Before switching on the router, insert the SIM card.
Step 1: Prepare the SIM Card
Make sure you are using the correct SIM size.
The ZTE MC801A uses a nano-SIM.
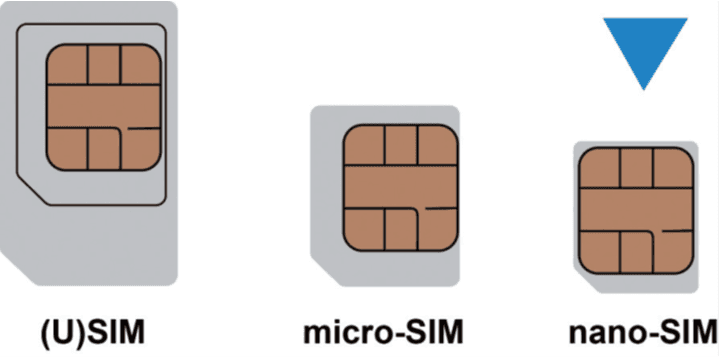
Step 2: Insert the SIM Card
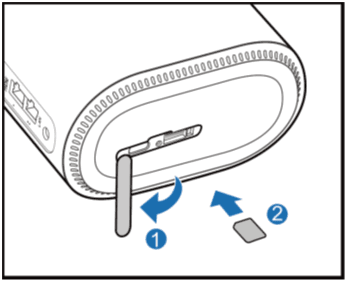
Open the SIM slot cover at the bottom of the router.
Insert the nano-SIM into the SIM slot.
Use the SIM card image on the router as a guide to make sure it is inserted the correct way.
You should feel a click when the SIM card is inserted correctly.
Power On the Router
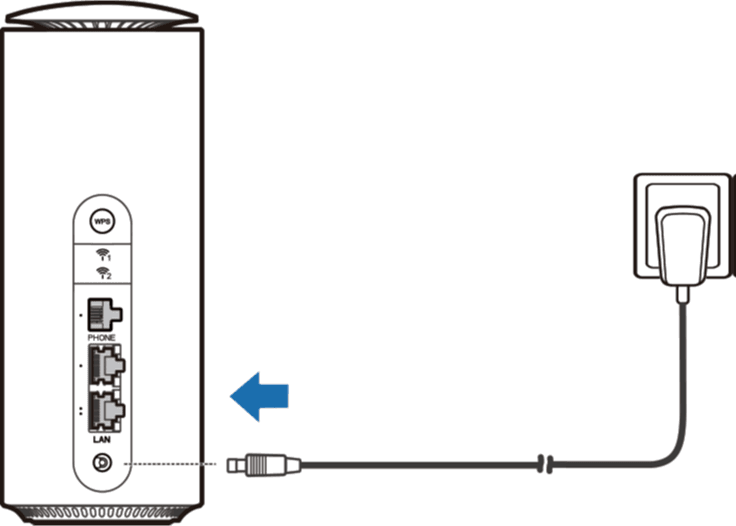
Connect the power adapter to the router.
Plug the power adapter into a wall socket and switch it on.
The router will start up and try to connect to the mobile network automatically.
Give it a few minutes to complete the startup process.
Connect to the Internet
You can connect your device to the router using WiFi or an Ethernet cable.
Connect Using WiFi
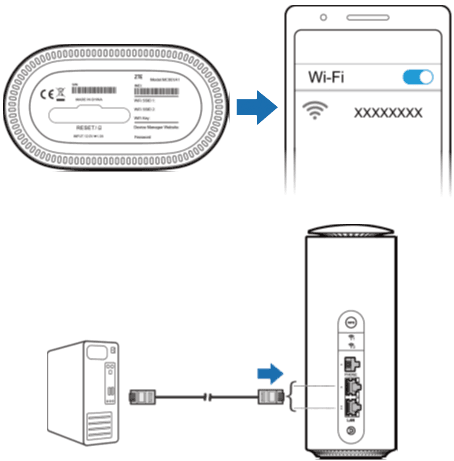
Find the default WiFi name and password on the sticker under the router.
On your phone, laptop, or tablet:
- Open your WiFi settings.
- Select the router’s WiFi network.
- Enter the WiFi password from the sticker.
- Connect to the network.
Use the 5GHz WiFi network for faster speeds when you are close to the router.
Use the 2.4GHz WiFi network if you are further away from the router.
Connect Using an Ethernet Cable
Plug one end of the Ethernet cable into the router’s LAN port.
Plug the other end into your computer or device.
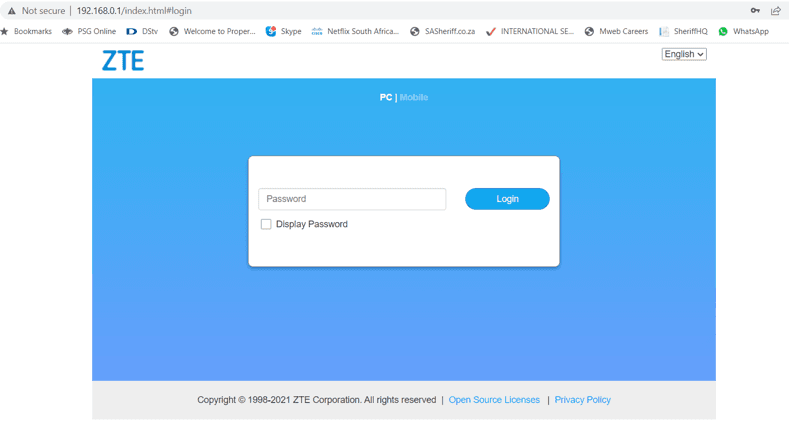
Log Into the Router
You can log into the router to change your WiFi name, WiFi password, and other settings.
Step 1: Connect to the Router
Connect your phone, tablet, or computer to the router using WiFi or an Ethernet cable.
Step 2: Open Your Browser
Open a web browser such as Google Chrome, Microsoft Edge, Safari, or Firefox.
Step 3: Enter the Router Address
Type the router address into the browser address bar.
The default router address is usually:
192.168.0.1
You can also check the sticker under the router for the correct router admin URL or IP address.
Step 4: Sign In
Enter the router admin password shown on the sticker under the router.
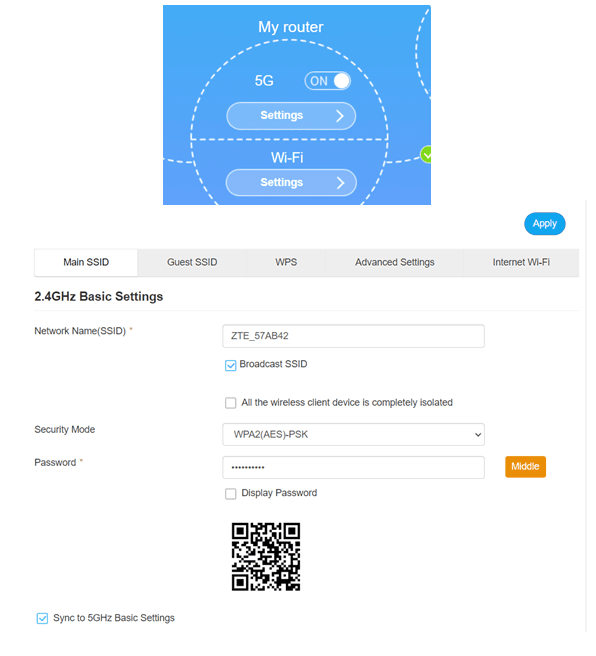
Once signed in, you can view the router status and change settings.
We recommend changing the router admin password after your first login.
Check the Network Settings
In the router settings, check the mobile network settings.
The recommended settings are:
- Network selection: 5G/4G/3G
- Connection mode: Automatic
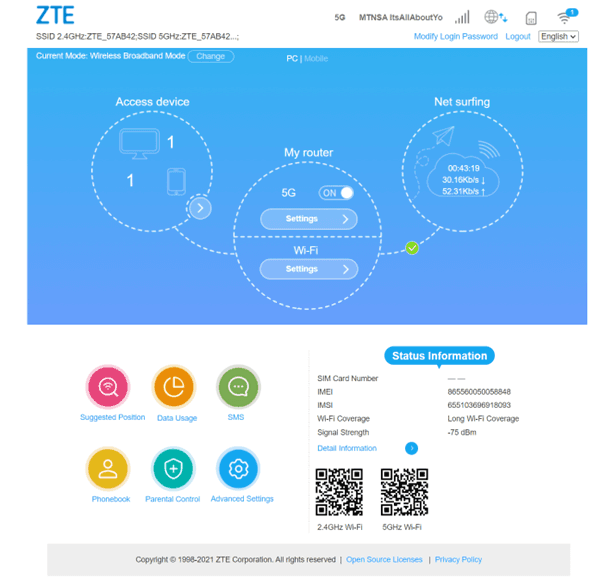
APN Settings
The APN tells the router which mobile data network settings to use.
Only change the APN if your service is not connecting, or if you have been asked to do so.
MTN 5G
For MTN 5G, the APN should be:
ws.dd.fwa
Telkom LTE
For Telkom LTE, the APN should be:
Internet
If you are using specialised software such as a VPN, trading app, remote access tool, or similar service, use:
Unrestricted
After changing the APN, save the settings and restart the router.
Change Your WiFi Name or Password
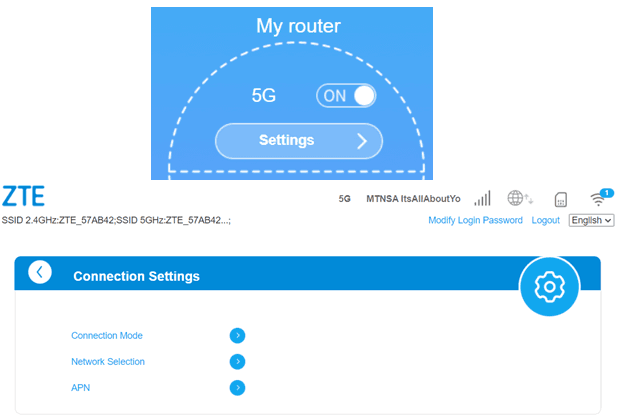
You can update your WiFi name and password from the router settings.
Step 1: Open WiFi Settings
Once logged into the router, select WiFi Settings.
Step 2: Update the WiFi Name
Change the Network Name or SSID to the WiFi name you want to use.
Step 3: Update the WiFi Password
Change the WiFi password to one you will remember.
Use a strong password that is not easy to guess.
Step 4: Apply the Changes
Select Apply to save your changes.
If you change your WiFi name or password, your devices will disconnect. Reconnect them using the new WiFi details.
Remember to update both the 2.4GHz and 5GHz WiFi settings if you want both networks to use the new details.
Where to Place Your 5G Router
Router placement can make a big difference to your signal and speed.
For best results:
- Place the router near a window.
- Keep it in an open area.
- Avoid placing it inside cupboards.
- Keep it away from thick walls, metal objects, and large appliances.
- Test different locations to find the best signal.
A stronger signal usually means better performance.
Troubleshooting
The Router Does Not Switch On
Check that:
- The power adapter is connected properly.
- The wall plug is switched on.
- You are using the power adapter supplied with the router.
The Router Shows a Red Network Light
Try the following:
- Make sure the SIM card is inserted correctly.
- Restart the router.
- Move the router closer to a window.
- Check that there is mobile coverage at your address.
- Confirm that your service is active.
WiFi Is Not Showing
Check that:
- The router is powered on.
- The WiFi light is on.
- You are close enough to the router.
- WiFi is enabled on your device.
Internet Is Slow
Try the following:
- Move the router to a better signal area.
- Connect to the 5GHz WiFi network if you are close to the router.
- Restart the router.
- Test using an Ethernet cable.
- Reduce the number of connected devices.
- Avoid placing the router behind a TV or inside a cabinet.
Quick Summary
To set up your ZTE MC801A 5G router:
- Insert the nano-SIM.
- Plug in the router and switch it on.
- Wait for the router to connect to the mobile network.
- Connect to WiFi using the details on the router sticker.
- Log in to the router using 192.168.0.1 if you need to change settings.
- For MTN 5G, the APN should be ws.dd.fwa.
- For Telkom LTE, the APN should be Internet or Unrestricted (If you are using specialised software such as a VPN, Trading app, etc.)