Use this guide to set up your Webafrica email account in Microsoft Outlook 2013 or Outlook 2016 using IMAP.
Before you start: Make sure you have your full Webafrica email address and email password ready.
Email Settings
| Account Type | IMAP |
| Incoming Mail Server | mail.webafrica.org.za |
| Outgoing Mail Server | mail.webafrica.org.za |
| Incoming Port | 993 |
| Incoming Encryption | SSL/TLS |
| Outgoing Port | 587 |
| Outgoing Encryption | STARTTLS |
| Username | Your full email address |
| Password | Your email password |
Step-by-Step Instructions
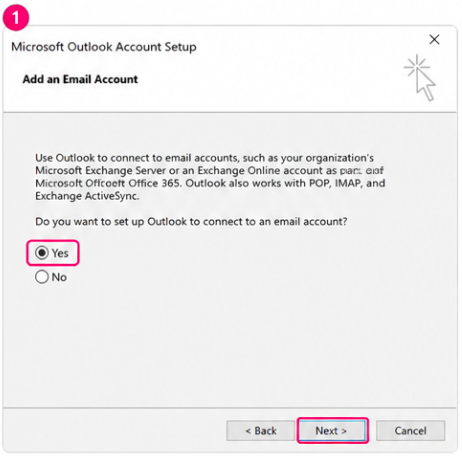
Step 1: Start the Outlook Email Setup
Open Microsoft Outlook.
If this is the first time you are opening Outlook, the Microsoft Outlook Account Setup screen will appear.
- Select Yes when asked if you want to set up Outlook to connect to an email account.
- Select Next.
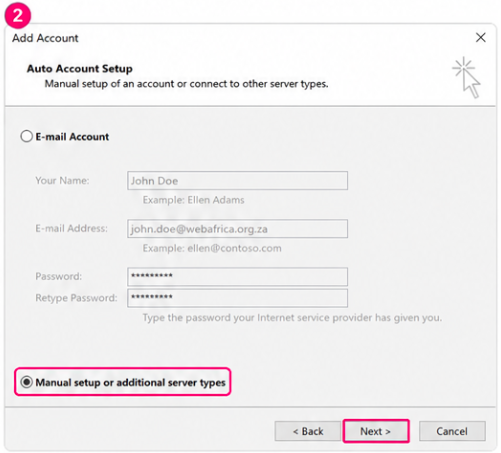
Step 2: Choose Manual Setup
- On the Add Account screen, select Manual setup or additional server types.
- Select Next.
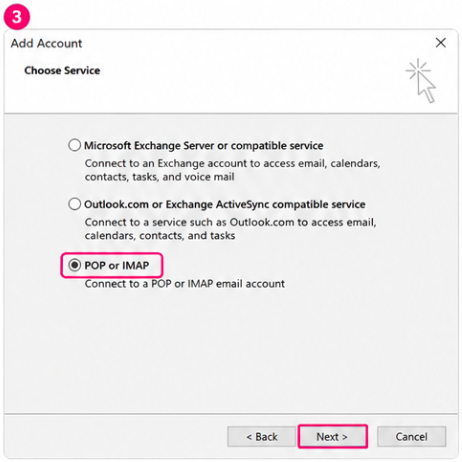
Step 3: Select POP or IMAP
- On the Choose Service screen, select POP or IMAP.
- Select Next.
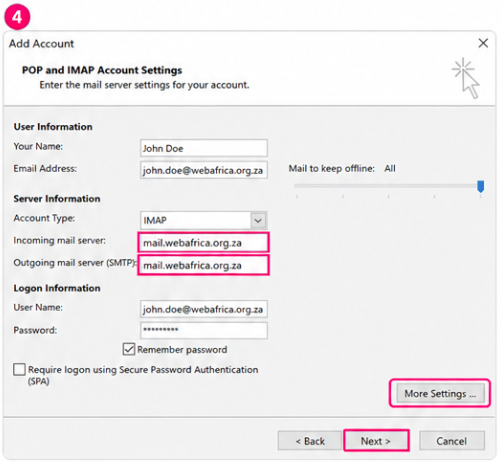
Step 4: Enter Your Account Details
On the POP and IMAP Account Settings screen, enter your email account information.
| Your Name | Enter your name as you want it to appear when sending emails. |
| Email Address | Enter your full Webafrica email address. |
| Account Type | Select IMAP. |
| Incoming Mail Server | Enter mail.webafrica.org.za. |
| Outgoing Mail Server (SMTP) | Enter mail.webafrica.org.za. |
| User Name | Enter your full Webafrica email address. |
| Password | Enter your email password. |
Tick Remember password if you want Outlook to save your password.
Select More Settings.
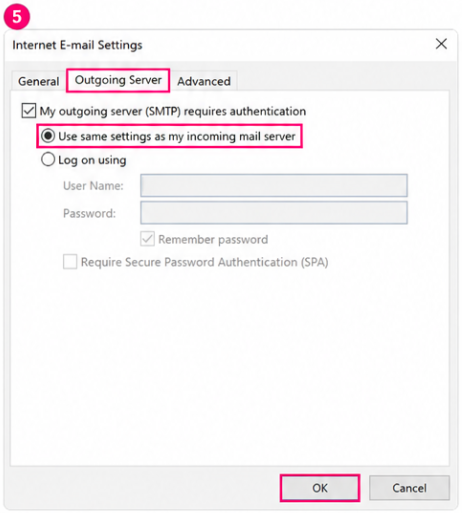
Step 5: Enable Outgoing Server Authentication
- Select the Outgoing Server tab.
- Tick My outgoing server (SMTP) requires authentication.
- Select Use same settings as my incoming mail server.
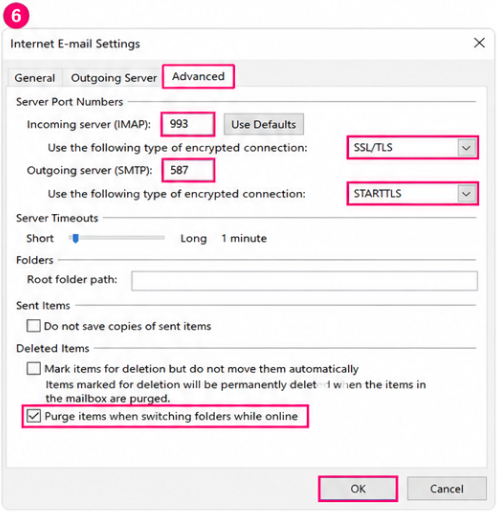
Step 6: Set the Advanced Server Settings
- Select the Advanced tab.
- Set Incoming server (IMAP) to 993.
- Set the incoming encrypted connection to SSL/TLS.
- Set Outgoing server (SMTP) to 587.
- Set the outgoing encrypted connection to STARTTLS.
- Select OK.
Step 7: Finish the Setup
- Select Next.
- Outlook will test the account settings.
- Once the test is successful, select Finish.
Your Webafrica email account is now set up in Outlook.
Troubleshooting Tips
- Make sure your username is your full Webafrica email address.
- Check that your email password is correct.
- Confirm that both mail servers are set to
mail.webafrica.org.za. - Confirm that IMAP uses port 993 with SSL/TLS.
- Confirm that SMTP uses port 587 with STARTTLS.
- Make sure outgoing server authentication is enabled.
- Check that your internet connection is working.